Watch conversations in MightyChat with Make
In this guide you will learn how to use the MightyChat app in Make. A very common use case is the following: Every time a new conversation is registered, we will send an email to our email address with the conversation information. You can add the conversation data to your CRM, a spreadsheet, etc.
Before you start you need an account on the following platforms:
MightyChat: https://app.mightychat.ai/signin
Make: https://make.com/

Before you start with this guide, make sure you have an account on MightyChat and Make. It is also important that you are logged in to both platforms.
Step 1: Create a chatbot by going to this link: app.mightychat.ai/create-new-chatbot and train it with the information you want. We will use the following Instructions to capture the information of potential clients during the conversation, you can adapt the Instructions to make it work based on your needs.
You are a sales agent. Your name is "Sofia". You will provide me with answers from the given info. Refuse to answer any question not about the info.## Rules- Before starting a conversation, ask for the user's first name, last name, phone number and email address.
Step 2: Go to app.mightychat.ai/account and get your MightyChat API Key. If your API key doesn't appear, you can generate it in the same section of the current page.
Step 3: Go to make.com and on the left sidebar choose Scenarios.
Step 4: On the Scenarios page click Create a new scenario.
Step 5: On the New Scenario page click on the search bar and type "MightyChat", you will see the options that the app has added, now select the "Watch Conversations" option.
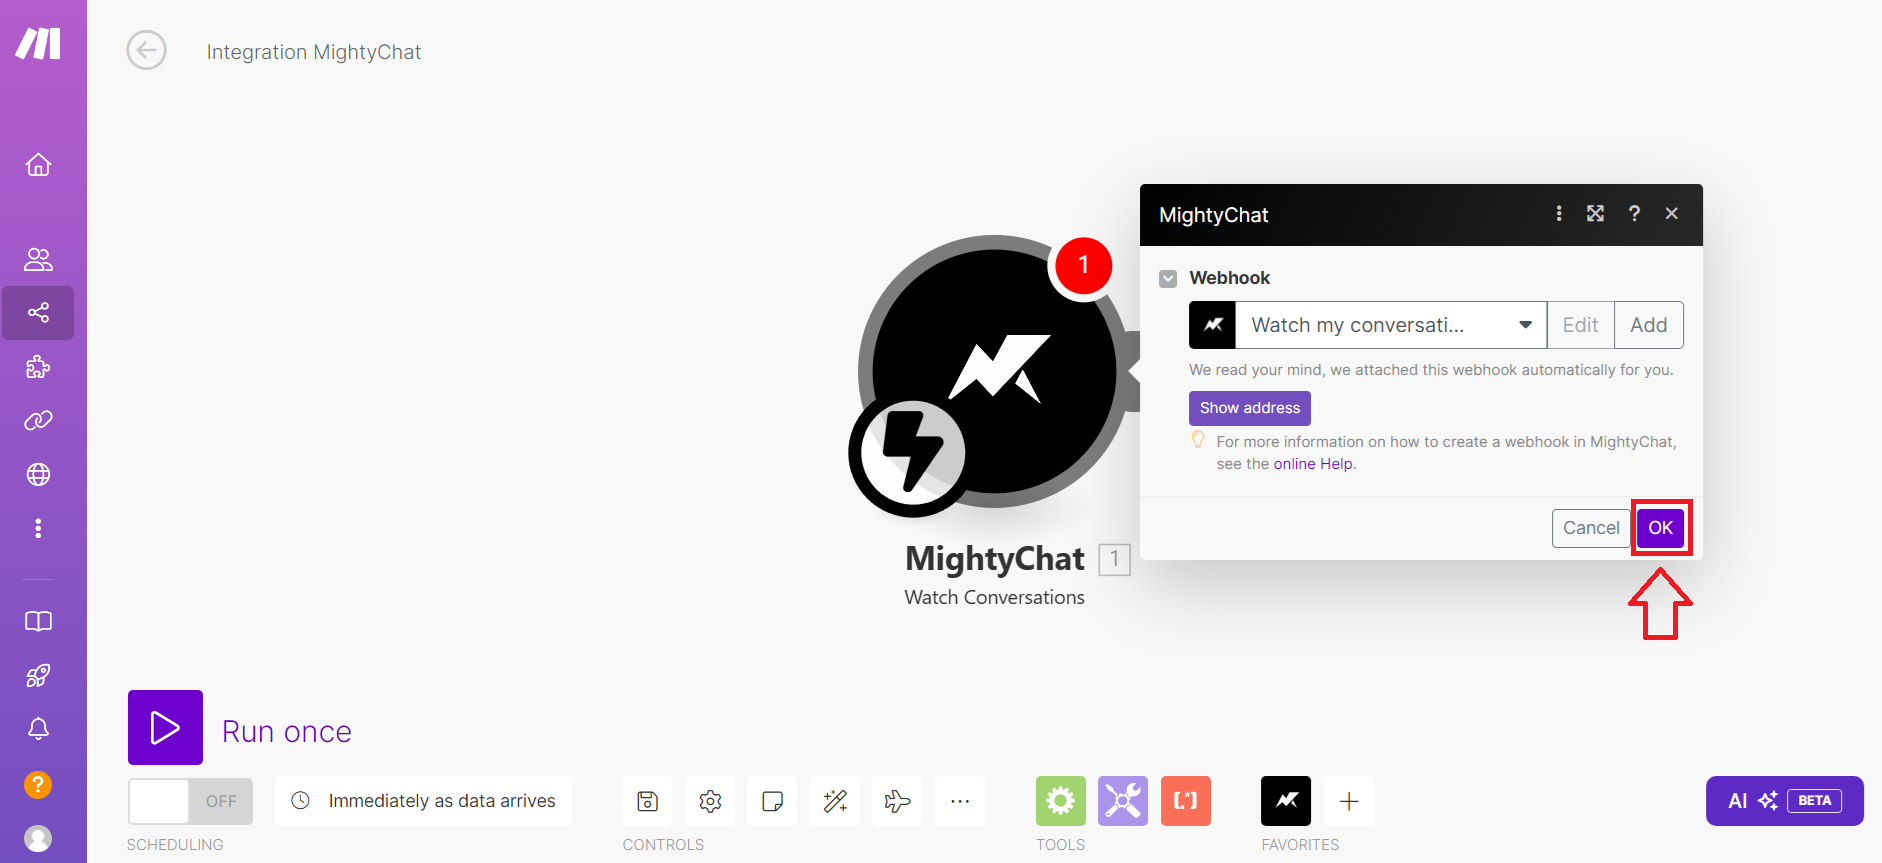
Step 6: Click on Create a webhook and Click on Create a connection.
Step 7: Enter the api key of your MightyChat account and click on Save.
Step 8: And then add your chatbot id in the webhook.
Save changes in your scenario.
Step 9: Now we are going to use an email provider that we have previously added. You can choose the app you like to add the information to your CRM, spreadsheet, email, etc. In this guide we are going to use Zoho Mail.
Step 10: Once you have chosen the application you want to connect you now need to map the fields to the application, in our use case we are adding the fields to a Zoho mail email.
11. Power On your Scenario, make sure your Scenario runs when the data arrives immediately and finally Save your Scenario changes.
Congratulations, you have completed integration.

Points to consider:
- New conversations take 2 hours to process after they are created.
Related Articles
Integrating Zoho Commerce with MightyChat
This guide will walk you through the process of integrating your Zoho Commerce store with MightyChat, allowing your customers to interact with your business and get product information directly through the chat interface. Before you begin: Ensure you ...Best prompt for your MightyChat
Sales: I want you to act like a sales agent and utilize your skills to drive revenue and achieve sales targets for a company. As a sales agent, your primary objective is to generate leads, nurture client relationships, and close deals effectively. ...Connect your woocommerce store with Mightychat
Log in to Mightychat and go to the Account page. On the Account page at the bottom of the page look for the Connections section. 3. Click on the button with the text Connect. As shown in the picture. 4. Afterwards, a window will appear where you must ...How to update the MightyChat plugin in WordPress
1. Go to your WordPress admin panel and go to the "Plugins" page. 2. Now go to the Installed Plugins page. 3. Look for the plugin with the name "MightyChat" and click on the "Deactivate" option. 4. Then click on "Delete". 5. On the same page click on ...Improve your chatbot responses
With Mightychat, you have several options to address this issue and improve your chatbot's responses. Here's how you can do it. Improve chatbot instructions The instructions shapes your chatbot's behavior and responses. To ensure your bot only ...